How to make a warm floor mats under the tile. Warm floor under the tile - we'll do it ourselves without any problems!
A warm floor is a quality heating solution. Therefore, today this system appears more and more in urban apartments and private houses. But here the question arises: what are their proposed manufacturers of warm floors better, because they are represented by three positions: water warm floors, electric and infrared. Probably, one can not say that some variant is better, but some worse, it is just necessary to choose exactly the conditions of operation for the model that will work effectively. In addition, we must also take into account the moment that it is possible to install a warm floor only under floor coverings with high thermal conductivity, which includes ceramic tiles. Therefore, this article will only consider one question: how is the laying of the warm floor under the tile.
Of course, all options will be considered in terms of using each model. But it is necessary to designate one point - all types of technologies for laying a warm floor under the tile have one identical stage - this is preparation. We'll start with it.
The main requirement for laying a warm floor under the tile is a smooth and solid foundation. Therefore, before moving to the basic installation works, that is, before making a warm floor, you need to level the floor surface.
If it is a concrete floor, then it is necessary to pour it over it concrete screed or any leveling mixture (on a cement or polymer basis). It is clear that the concrete screed will dry longer, but its price is less than the finished leveling compounds. At the same time its thickness under the warm floor should not be less than 3 cm, which increases the consumption of the solution, while increasing the financial costs.
If the floor is wooden, then it is recommended to level it with slabs of wood, for example, plywood, OSB, chipboard and so on. It is better to give preference to inexpensive but strong products, for example, chipboard, the plates of which are interconnected by a lock groove, which provides a surface without gaps. At the same time, it is optimal if stacking plates with offset, which will ensure a uniform distribution of loads on the wooden floor itself.

There is one more point related to the preparatory stage. This is the insulation of the floor surface, which will ensure a reduction in heat losses. Since the installation of a warm floor under the tile is associated with the installation of heating elements on the floor base, care must be taken to ensure that the heat emanating from the elements of the warm floor does not pass through this base. Of course, it can be guaranteed that the wooden floor from this is insured, because the wood itself is a good heat insulator. But when it comes to concrete floors, then there is no separate thermal insulation layer.
Specialists recommend that the thermal insulation layer should not be made of foam or fibrous material. But, that in its structure there was a reflecting layer which will keep the infrared radiation coming from the elements of the heating structure. Therefore, on the floor before installing a warm floor, you must lay a heater with a foil layer on one side. The benefit of such today is a huge amount in the modern market of building materials. But here it is necessary to take into account also such a moment that this material should not be thick, because the thicker the layers laid, the lower the ceiling height in the rooms. Of all the materials offered, a foam foil heater is suitable for this.
So, foamed penofol is a roll material made of foamed polyethylene with a thickness of 5 mm. For example, its thermal insulation qualities are equal to the slab of mineral wool, the thickness of which is 80 mm. Lay the strips of penofol end-to-end, covering gaps and slots with aluminum adhesive tape.

Mounting technology
So, before you put a warm floor under the tile, you need to conduct a sufficiently large amount of preparatory activities. True, all this is done by oneself - the problem is not the greatest. It is much more difficult to conduct the main process. But if you understand everything and understand the scheme of laying the floor under the tiles with your own hands, then you can do with small forces, without investing big funds in the services of professionals.
Now you need to deal with each warm floor separately. That is, it is necessary to understand what is the device of the warm floor under the tile.
Electric heated floor
Currently, manufacturers of warm electric floors offer two of its kind. This is a heating cable, as a separate element, and mats. The latter are all the same cable, only installed and fixed to a special mesh of polymer. In fact, this is a finished product, which you only have to unwind, lay on the floor and make a connection to the supply mains. At the same time, the distance between the cable sections at the mats is the same, that is, there is no need to think through the laying scheme with the necessary dimensions between the turns.
But there are certain requirements to the electrical heat floor regarding its installation.
- The heating element from the surfaces of the walls should be spaced at a distance of 10 cm.
- Do not install a warm floor (electric) under heavy furniture, household appliances and household items.
- If this design is planned to be used as the main heating, then it is necessary to choose heating elements at the rate of 140-180 W per 1 m² of floor area. If the heated floor is used as an additional heating system, then low-power structures up to 140 W / m², for example, 80 W / m², can be laid. The thing is that the basic requirement for heating system - This is 1 kW of thermal power per 10 m² of surface. And this is without taking into account the heat losses.

Now you can go to the main stage - how to put the warm floor correctly. So, in the electric warm floor includes, in addition to the cable or mats, also a thermostat with the help of which the temperature mode is set, and a temperature sensor that will monitor the same temperature.
- First, the heating cable or mats are laid. The cable is mounted with a snake and fastened to plywood, chipboard or concrete floor with special clamps. Some masters use even building scotch, because the main thing is to fix and mount the scheme, and the fixing will be done with tile glue. Mats are evenly distributed on the floor surface, covering the whole floor. Mounting, exactly the same as the cable.
- Then a temperature sensor is installed in a special corrugated hose. Its location is on the floor between two turns of cable.
- Installation of the thermostat is made on the wall at a height of 1.5 m. It simultaneously connects to both the temperature sensor and the heating element. Ideally - if the connecting wires are hidden in the stroba on the wall.
In principle, everything is ready. But before laying the tiles on the warm floor, you need to test the last.
Attention! It can not be switched on, it can burn right away. It must be checked for resistance, which is indicated in the passport. The test is carried out with a multimeter, the readings of which should coincide with the passport data during testing. If the deviation is not more than 10% - this is normal.

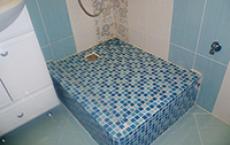
The very same laying the tiles on the warm floor with their own hands is made by standard technology. That is, first the marking is done, it is better to begin the process of facing from the most visible angle of the room, far from the entrance door. Adhesive composition is applied to the base with warm floors, on which the tile itself is mounted. Mandatory between the tiles is maintained clearance with the installation of plastic crosses. And in the end, a grout must be applied to the tile to decorate the joints.
Water heated floor
Usually installing a warm floor under the tile (meaning water) is done only in private homes. In apartments this construction can be assembled, and even connected to the system central heating, but this venture will be very expensive. And it's not always possible to do this, and even more so, with your own hands, if in this case you are a layman. Plus, the overlap of the high-rise building is a concrete slab, which will not only be leveled, but also well insulated, especially for apartments on the ground floor.
Therefore, the thickness of the entire multi-layer pie together with the warm floors and ceramic tiles will be at least 10 cm. And this is the minimum figure that will affect the ceiling height, which is too large for city apartments.
As for thermal insulation, much will depend on the material from which the floor itself was constructed. If it is plywood or chipboard, then it is recommended to use the same foamed penofol. If this concrete base, then it is possible to lay polystyrene plates on top of the concrete, in which grooves for laying pipes of a water warm floor are made. In order to reflect IR radiation not to the side of the floor, but upwards, special inserts of aluminum alloy are installed inside the grooves. This option is called a bedding method. To date, it is the most qualitative and fastest in the installation of a warm floor.

By the way, if the floor is made of plywood or other wood-based panels, the flooring technology can also be applied. The main thing is to correctly choose the glue composition with which the plates of expanded polystyrene will be fixed on plywood or other board materials. More recently, this insulation was fixed to the surfaces with special mushroom-shaped self-tapping screws made of plastic. In principle, they can still be used today, but better glue. Easier and faster.
After the preparatory phase, you can go directly to the assembly of pipes. it plastic pipes, which are connected with each other by fittings using welding technology. Spread out the assembly scheme with a snake or spiral, the ends of which are removed to the wall, and subsequently connected to the installed collector. The latter itself is connected through a pipe line with a heating boiler.
Before laying the screed on a floor heating system, you need to check the floor. Typically, a pressure test is performed using the pressure inside the system, which should be 1.5 times the normal pressure. There are two options:
- Pump the water with a pump.
- To pump air with a compressor.
In this condition, the heating system must be a day, during which the defects of the connections will be detected.
![]()
If the crimping has not revealed any flaws, you can proceed to the screed. This is to the question whether it is possible to lay the tile on the pipes. Unfortunately, this layer can not be avoided, because the pipes of the warm floor have a minimum diameter of 20 mm. And this big size, which creates large differences in the plane, and they will have to be hidden. And here are two options:
- As a screed, use a cement-sand mortar. Economical, but you have to wait 20-25 days for the layer to dry.
- Self-leveling mixtures. Expensive, but this material dries 10 days.
And after this stage, you can put the tile on the floor. The technology is the same as with the electric warm floor. But before laying the tile, it is recommended that the screed be treated with a primer in order to increase the adhesion of the surface.
Conclusion on the topic
In the article was discussed the topic of how to lay the warm floor under the tile with your own hands. Not the easiest process. Therefore, starting to understand it, it is necessary to take into account all the nuances and rules of all stages. Any wrong process will ultimately affect the quality of the final result. For example, even if the screed was incorrectly poured, or the plywood was not properly laid, or it was fixed inefficiently. There are no trifles in this business, everything is important and important.
Among modern heating systems, one of the main places is occupied by a water or electric warm floor under the tile. Which is better to choose from them - the question is not idle. On this depends the comfort in the house and saving energy. Water heating is prohibited in multi-storey buildings. Therefore, heating the house with warm floors is done mainly with the help of electricity. The heating is controlled by a thermostat installed on the wall.
The advantage of the method is uniform heating of the room. At the same time, a decrease in the average room temperature of 2-3 ° C will not cause discomfort. Saving electricity here is 10-15%. Especially requires a warm floor for tiles or ceramic tiles, cold for the feet.
Types of heaters
Heat is created by the following heating elements, embedded in the floor:
- cables;
- mats;
- infrared film.
The modern market offers different options. It remains to choose the electric warm floor under the tile. Which is better? Let's try to understand. 
Cables
The cables are resistive and self-regulating. All of them are mounted in with reinforcement, which occupies 3-5 cm of additional height of the room. In addition, the top is laid tiles, taking up to 2 cm.
Resistive cable
When heated electric floors are installed, prices are the lowest for a resistive heating cable, which is single- and double-core.  When an electric current passes through it, heat is released. The cable has a constant power. It can be stacked arbitrarily in rooms with a complex floor shape.
Self-regulating cable
This type of cable is different in principle. It consists of two conductors arranged in parallel. Between them is placed a semiconductor polymer. Through it passes current in the transverse direction. In different areas, the heat dissipation in the cable can be different, depending on the temperature in the room. Therefore, there will not be overheating in some places, if there will be furniture or household appliances. It is important that too much load does not damage the cable.
Mats
What kind of floor under the tile to install, the homeowner decides, but it is best to fit heating mats from a hyperfine cable glued to the grid.  They are made in the form of rolls of different widths, with a power of 130-150 watts. The mats are easily connected to each other by terminals. Assembly is reliable, if the joints are additionally glued with adhesive tape or smeared with a special sealant. Connections with the cable going to the thermostat, protrude a little, but they can be embedded in the hollows of the floor or wall. High strength and durability of cable insulation do not require mandatory installation in a sand-cement screed. Mats can be placed in a layer of tile adhesive without waterproofing. The thickness of the warm floor will be negligible.
Film Infrared Floor
The heater consists of flat carbon conductors, laminated to a roll of special electrotechnical film. This option was originally designed for laying under floor coverings without screed or glue. Not every film floor can withstand the alkaline environment of mortar. Under the tile it can be applied, but an additional waterproofing of polyethylene is required.
Selecting the power of the heaters
When it is planned to make an electric warm floor under the tile, which is better for power, depends on the type of room.
Determination of useful area
Under bulky furniture and household appliances, heating is not done due to overload and disruption of normal air circulation. It should be taken into account that it is advisable to heat up at least 70% of the floor of the room, when the electric heating serves as the main source of heat. At the same time, its specific power should be 110-220 W / m 2. If the usable area is less, the electrical floor will have to be abandoned or the layout of the room changed. For the kitchen or living room, the power is approaching the lower limit, and in the bathroom, on the loggia or in the premises of the first floor, it needs more. The best option is to operate the heating system by 70-75%.
How to calculate when buying
Before you make a warm floor at home, you need to correctly calculate the power, which depends on the type and area of the room. The figure below shows through a thermographic device with heating of different power (surface temperature 15-25 ° C). 
The room requires a specific power of 100-160 W / m 2. For an auxiliary heat source, it can be selected at a minimum.
For a room of 20 m 2 the useful area will be 20 · 70/100% = 14 m 2.
Then the required power is W = 100 · 14 = 1.4 kW.
When the main source, you need to take the maximum: W = 160 · 14 = 2.24 kW.
The cost of a resistive cable is not very high, and it makes sense to take it as the main source of heating, which is not necessarily 100% used.
If the power of the cable is 20 W / m, then the main source needs a length
L = 2.24 · 1000/20 = 112 m.
At the ends of the cable, special couplings are installed. Therefore, they are sold in fixed segments. At purchase it is possible to choose a cable of the demanded capacity, close to settlement.
How to lay a warm floor
When laying a warm electric floor with your own hands, you should know that a thermal insulation is needed from below. It is not worth saving on it, because it is a reliable home heat insulation. In addition, all the heat emitted by the warm floor will go up, into the room.
According to user feedback, many prefer the installation of electric underfloor heating tiles. The solution can be considered correct, since the electric floor is well compatible with most types of flooring and in particular, for ceramic tiles, granite, natural stone.
Pros of the electric floor under the tile
- the opportunity to provide space heating at any time of the year. There is no need to wait for the beginning of the heating season (actual for apartments in multi-storey buildings with central heating);
- the installation of electrical heating eliminates leaks, as in the case of a hot water field;
- the floor will not freeze (freeze) in the winter in case of disconnection or interruptions in electricity supply, as in the case of water floors;
- convenient and precise adjustment of the surface temperature of the floor;
- minimum stalling of the room height, due to the thinner diameter of the heating cable and the smaller thickness of the screed;
- unchanged heating power throughout the entire paving area;
- ease of maintenance.
However, even when a choice is made in favor of using electricity, it is still necessary to determine which electric warm floors under the tile are better, and what kind of systems to use.
Types of electric underfloor heating tiles
- cable - heating resistive cable for the warm floor in the coil (bay). Mounted by clamping on a special lath. You can buy a complete set that contains a minimum or full set of accessories. Some kits include even a tool. The price of the kit depends on its power, cable length and configuration. You can save money by self-selection of elements and performing self-assembly. When choosing, it is necessary to take into account that the heating cable for flooring can be single- and double-core. The second option is preferable, because it is more reliable, the first one is cheaper;
- heating mats (cable). Masters are advised to choose this option if planned self-assembly. The cost of mats is one-third higher, but in terms of simplicity of calculation and stacking, it significantly exceeds the previous version;
- film (infrared) warm floor. The most expensive option, but the most reliable in terms of security. First of all, due to the absence of electromagnetic waves.
After analyzing user feedback and recommendations of the masters, it can be noted that the cable floor in mats is the most preferable option for the device of the system of electric warm floor. While the cable floors under the tile are less common. This is mainly due to the need to fill the screed, which:
- increases the load on the slab (which is undesirable in multi-storey buildings);
- reduces the height of the ceiling;
- filling of the screed is accompanied by wet work, which is not always acceptable to users;
- a long period of drying (curing of concrete solution).
In addition, calculating the length of the heating cable is more complicated than heating mats.
own hands
It should be noted that the technology of laying the electric floor for the tile differs somewhat depending on the type of floor, but some of the stages for them are identical:
1. Preparation of the draft of a warm floor
Designing is an important component, in this case, a good design allows you to reduce the cost of purchasing materials and avoid local overheating of the cable.
When designing a project, it should be remembered that for furniture and heavy household appliances (for example, washer, a refrigerator) the cable does not fit. This creates an additional load on the system (heated air will not rise upward, but return to the source of heat), which can be avoided. For the same reason, it is recommended to purchase a bed on legs. In addition, the cable (or mat) should be located at a distance of 150-200 mm from the wall. The distance between adjacent turns is not less than 100 mm.
The project determines the location of the heat regulator. Usually it is mounted at a height of 900-1 000 mm from the floor surface. This location will be optimal, since it will be convenient to use the regulator and it will not be necessary to build a large section of the wall for laying the wire connecting the regulator and the cable.
2. Thermal insulation for electric underfloor heating
This stage can precede the next or be performed after it. It all depends on the type of heat insulation material used. The choice of the thickness of the insulation depends on the condition of the slabs and the installation site:
- thick insulation layer is advisable to do over the basement, the ground or unheated room, as well as on the balcony or loggia. For these purposes, foam or polystyrene foam is suitable. Thick material is wiser to lay before leveling the floor. The thickness of the layer is from 20 to 100 mm;
- a thin heat-insulating layer is laid on the prepared floor. Usually foil foam foil is used for this purpose, which is laid up with a reflecting surface. Such a substrate will direct heat to the room.
Heat insulation is laid away from the wall. The thicker the insulation - the greater the distance. So for expanded polystyrene it will be 100 mm, for penofol - 50 mm. Place the abutment of the insulation to the wall with a damper tape. It is designed to compensate for the thermal expansion of the material.
3. Preparation of the base under the electric warm floor
The heating cable or heating mat is laid only on a flat, clean, dust-free floor surface. Thus, the preparation of the surface includes the removal of protruding sections of the floor, the filling of cracks, cleaning from dust. And, ideally, applying a primer. If the surface is uneven under the warm floor, a screed should be made. If time allows you can use a concrete screed, but further work will continue only after the surface dries completely. With a limited time resource and a relatively flat surface, you can give preference to bulk floors.
Laying the cable on a wooden floor or plywood is not desirable, this will lead to heat loss.
Wall shattering is also performed at this stage.
Council. If the installation of the electric floor system is carried out in a renovated room, you can use the outer wire laying - in plastic boxes.
4. Installation of temperature controller and temperature sensor
The heat regulator is installed in the place designated for it. The wire that will connect the regulator and the cable is laid in the corrugation. In turn, the corrugation is placed in the tube and brought to the location of the sensor. The sensor is installed at a distance of 300-400 mm. From the edge of the wall between the turns of the cable. This makes it possible to adequately measure the temperature of the system.
Goffre should be laid without kinks (especially in the area of the plinth), and the edge resting on the system must be insulated with a sealant, in order to avoid getting a screed solution.
The temperature sensor is also placed in the corrugation. This place of installation is justified by the fact that it significantly improves the maintainability of this device.


5. Laying of an electric underfloor under the tile
To ensure that the floor heating system functions reliably, you need to put the cable or heating mat correctly, the laying technology of which will be different.
Installation of a cable of a warm floor under a tile
Before you start laying the cable, you need to check the resistance of the cable. Then fix on the floor a special tape with fasteners. Due to the fact that the fastener on the tape is often located, the installer can easily arrange the cable at the right distance from each other. The second option is to lay a metal mesh on the floor and fix the cable to it using a plastic clamp. And the clamp is not tightened much. Such a device of the cable floor under the tile is convenient in that it creates additional rigidity.
The heating cable is located at a distance of 150-200 mm from the wall, and 100 mm from each other. Stacking is usually performed by a snake.
Mounting mats for a warm electric floor under the tile
Heating mats are easier to install than cables. To prepare the system for start-up, just lay the mats on the floor and check the resistance. At the same time, during the laying process, the electric mat can be laid straight, with a turn (for this, the carrier grid is cut) or with a turn (the grid is cut and unfolded). Also, by cutting the grid, you can bypass obstacles (for example, a podium).
Requirements for the location of the mat are the same as for the cable, and the distance between the sections is 50-100 mm. The laid mat is fixed with an adhesive tape.


The grounding device and RCD for warm electric floors are mandatory, regardless of the location of their installation.
Note. As for the installation of an electric floor heating system in a sauna or a sauna, there is no consensus among users. Some of them argue that when proper installation It is acceptable to install the system in any room in the bath. Part claims that installation is inadmissible in the sink. Or it is recommended to turn off the warm floor in the process of using the sink / shower. In any case, this is electricity, so operation in a humid environment is extremely dangerous.
6. Testing - checking the electric underfloor heating
 Before you fill the screed or start laying the tiles, you need to check the resistance of the wire. You can do this with a tester or a multimeter.
The discrepancy between the results obtained and the passport data should not exceed 10%.
7. The device of a screed of an electric warm floor
When calculating the height (thickness) of the screed, you must proceed from the thickness of the cable. The thicker it is, the greater the height of the screed.
What is the thickness of the screed?
- for the cable floor, the recommended height of the screed is 30-50 mm;
- for floor from heating mats - up to 30 mm.
To fill the screed, you can use concrete mortar, but it dries long and reduces the height of the room. Alternative option - floor screed with glue for tiles.

Many users note that when forming a system of floor heating from heating mats, they did not make screeds, but laid the tile directly on the mat. This way of laying is justified, if you make a glue layer 15-20 mm thick.

The technology of laying tiles on the warm floor is also carried out, as well as on the usual prepared base. The only feature - you need to buy a special adhesive mixture, designed for laying on a warm base. Typically, such tile mixtures are appropriately marked "warm floor" or a range of operating temperatures.
When applying the solution directly to the heating mat, care should be taken to ensure that no voids remain; these are "air pockets" which can lead to overheating of the cable. Apply the adhesive to the mat with a special spatula very carefully, so as not to cause mechanical damage to the system. Moving on the floor and applying grout can be done in a day, and operate the system only after the adhesive layer has dried completely, which will prevent the appearance of cracks due to uneven drying under the influence of temperature.

Information in the form of step-by-step instructions designates the main stages of how to make a warm electric floor under the tile in the home. The right choice of components and compliance with the rules for connecting the elements guarantees the result - a reliable tiled floor with heating in a private house or apartment.
Numerous advantages of ceramic tiles cause its wide application as a finishing material, including floor covering, in premises of different purposes. However, the strength of ceramics, provided by high density of the material or the face layer of the glaze, also has an undesirable side effect - even laid on the insulation, the tile to the touch is always cold, and contact with it is unpleasant. Modern technologies allow neutralizing this factor by heating the cladding from the bottom - a system of "warm" floors installed under the tile, which, depending on the source of heat, can be water or electric.
The installation of an electrical cable floor under the tile is the best option for heating
Acquisition of the equipment of a water system of warm floors requires considerable expenses, its installation is complicated, and the effect of the economy of exploitation will be manifested after several years of use. The cost of an electric floor heating system is lower, its installation is simpler, although it requires certain skills, so consider the technology and the nuances of mounting warm electric fields, although they have their drawbacks.
- Substrate preparation.
- Installation of electric heating.
- Selection of materials for finishing the electric floor heating system and installation of tiles on the warm floor.
Consider the characteristics of the electric floor heating system, breaking them into advantages and disadvantages.

A warm electric floor is a system that uses electricity as a heat source
Pluses:
- practicality - the possibility of self-assembly, ease of management;
- versatility - the possibility of using the system not only for the convenience of contact with the floor, but also as the main device for heating the room;
- rapid heating of the floor surface with electrical elements;
- uniform convection of heat from the entire heated floor area, which does not require high base temperatures and excludes concentration of dust on the heat source;
- guaranteed dryness of the floor;
- reduction of heat loss through the ceiling surface - at the top is cooled air;
- exclusion of footwear from the list of wear factors of tiles;
- ecology - no toxic emissions accompanying heating - smoke, odors, steam.
Disadvantages:
- dependence on the availability of electricity;
- the need to reconcile the installation of a local floor electric heating with the organization operating the electricity network;
- restrictions in the choice of facing;
- the complexity of manufacturing the repair of heating elements due to the lack of technological access to them;
- the high cost of operation, caused by a significant consumption of electricity (140-160 W / m2 for rapid heating of the floor).
Arguments for both, and against, are serious, therefore, the decision on the feasibility of installing a floor heating system depends on the customer and the specific circumstances.
There are several types of electric heating systems for floors, differing in the device and the principle of operation of heating elements:
- cable floor heating;
- heating mats;
- infrared heating system.

There are two groups of warm floors: water and electric
Warm floors with cable heating are the most budgetary, but with a number of drawbacks - the duration of installation, insufficient reliability, dryness of heated air. The infrared system is the most qualitative and, consequently, the most expensive, despite the fact that its installation is possible without the construction of a coupler.
Substrate preparation
The successful installation of an electric floor heating system and the laying of tiles on a warm floor is impossible without proper preparation of the base. Consider this important component of the arrangement of warm floors, breaking it into stages:
- dismantling of the old flooring;
- the device of steam and waterproofing;
- installation of thermal insulation;
- the construction of a screed under a warm electric field.
Dismantling of the old floor covering
The old floor covering is dismantled to the bearing concrete base, after which the floor is blackened - a thin layer (1-1.5 cm) of a liquid cement-sand mortar is filled with a spatula and chips, pre-priming the surface of the concrete. To further arrangement of the foundation, you can proceed only after 2-3 days, when the applied hardened solution dries.
On top of the hardened and dried solution, two layers of dense sheet-metal technical polyethylene are laid crosswise, with the stripes overlapping each other with a value of 5 cm, the internal surface of the blanks is treated with bituminous mastic. The cellophane is applied to the walls by a size of 10 cm and is also covered in places where the mastic is adhered. Depending on the type of mastic, it dries for 1-2 days.

The first layer of vapor barrier film is laid for steam and waterproofing
Execution of thermal insulation
In order to avoid heat losses due to heat transfer downwards, a thermal insulation device is necessary on top of the polyethylene, which is made by stacking the sheets of extruded polystyrene sheets 3-10 cm thick (depending on the floor of the room arrangement). The seams between the packed sheets are filled with bituminous mastic, covered with stripes of capron reinforcing mesh in a width of 10-15 cm and are smeared with the same composition.
After the bituminous mastics dry up, they start the device of the preparatory hardening screed.
The construction of a coupler under a warm electric power
On top of the thermal insulation of extruded polystyrene foam, a reinforcing mesh, steel or fiberglass mesh, is laid. Steel mesh is knitted from reinforcement 5-6 mm thick with a 10x10 cm cell size with a knitting wire. A grid of plastic fittings knit with special plastic clamps, the thickness of the reinforcement is 4-6 mm, the cell size is the same. The reinforcing mesh is laid in such a way that it does not touch the insulation - put small flat stones under the rods or cut it with narrow, short strips of glass.
The screed is made of a 1: 3 cement-sand mortar with the addition of polypropylene fiber in the dry mixing stage, which increases the resistance of the substrate to cracking. A day after the screed is covered with polyethylene for 5-7 days, after which the film coating is removed and another 2-3 days wet the surface of the concrete with water. Then the base is allowed to dry completely - this will be indicated by a uniform light gray color of the screed surface.
Installation of electric heating
Installation of heated floors with electric heating is performed taking into account the nuances of the selected type of equipment. In brief, we will review the recommendations for mounting each type.

Cable heating floor is arranged from the cable and thermostat. When choosing a cable that is manufactured single- and double-core, you should give preference to a more reliable two-wire. The cable is laid as follows:
- on top of the reinforced leveling base, a layer of unfoelled foam foil (heat insulating material) must be put in place;
- on penofol put and mount self-tapping tape, for which the installation of the cable according to the design scheme (the length is calculated depending on the area of the heated surface, cable cutting is unacceptable);
- over the cable a screed made of a cement-sand mortar with a thickness of approximately 3 cm is made.
The use of foamed penofol in the installation of electrical systems of warm floors is prohibited in connection with the electro-water properties of the foil.
do not require for their installation of the screed, lay the tile directly on the mats, covering them with a layer of tile adhesive. To fill the voids in the mats and glue the tiles with the whole area to the base, the layer of tile adhesive should be at least 1 cm. The absence of a mattress and the proximity of their location to the surface of the ceramic liner shortens the heating time of the floor after the system is turned on.

Heating cable mats
On the floor areas planned for the installation of furniture, mats do not fit to exclude the possibility of their damage.
Infrared heating system will ensure effective heating of the premises with the help of a film thermal cover, if you lay it on 80% of the floor area. Installation of an infrared heating system does not require its penetration into the screed and is performed in one day. Damage and failure of one film element of the system (section) does not result in failure of the entire device. To mount an infrared electric floor under the tile with your own hands, you need some theoretical knowledge and skills to perform this type of work, so the installation is better to instruct professional performers.
Selection of materials for finishing the electric floor heating system and installation of tiles on the warm floor
Ceramic tile, tile glue and trowelling mixture for the cladding of electrical warm floors must meet the operating conditions. The requirements for these materials are identical to the requirements for finishing the water floor heating system.
Tiles for laying on a warm floor should have the following characteristics:
- high density (sufficient thermal conductivity);
- heat resistance;
- low coefficient of thermal expansion;
- resistance to temperature changes.
These requirements are fully met by tiles made of natural stone (granite, marble, slate), granite, glazed broom with corrugated surface, glazed clinker. Terracotta because of the relatively high porosity has thermal insulation properties, so it is irrational to lay it on warm floors.
Requirements for tile glue and trowel for finishing with ceramic floors:
- high degree of adhesion;
- elasticity after curing;
- water resistance;
- heat resistance;
- resistance to temperature changes.

On the packaging of gluing and trowelling mixtures intended for use in the finishing of warm floors, there is necessarily a note on this. Therefore, when the material is selected by this principle, the issue of the suitability of the glue to be solved can be considered.
Laying tiles on a warm floor with electric heating is not very different from the way to lay the tile on the base without heating. And yet there are nuances, let's enumerate them:
- on the perimeter of the room between the finish of the warm floor and the walls leave a fixed gap of 0.5-1 cm (temperature seam), filled with elastic filler (rubber sealant);
- seamless tiling warm floors do not apply;
- tile adhesive to reduce the probability of voids should be placed on both surfaces - the tile and the base, and do it with a flat spatula;
- intertwining seams for impregnating the liner are impregnated after curing with a hydrophobic composition.
Making a decision to equip housing with warm electric floors - an expensive system, repair of which entails a complete replacement of the floor covering in at least one room, it is necessary to weigh the need for this device well and take into account its capabilities in case of failure.
The warm floor has many advantages, among which a separate consideration deserve 2 main points. First, with the help of such a system, the user can independently set the desired temperature regime in each room, i. E. dependence on radiator heating is excluded. Secondly, the warm floor is perfectly combined with the most diverse options for finishing finishes, and tiles are no exception.
Most often in combination with tiles are used electrical systems underfloor heating. It is with the order of arrangement of such heating, and specifically its cable version, you are invited to read further. Other types of electric underfloor heating are installed in a similar manner with minor differences, which are usually detailed in the manufacturers' instructions.
The scope of use of the water system is limited by the provisions of the current legislation, and it is extremely difficult to cope with the arrangement of such heating without the availability of appropriate skills, therefore the order of its installation will not be considered.
The information presented will help you get a full picture of the upcoming event and do everything yourself, without the costs of paying for the services of third-party specialists.
Important rules for connecting a warm floor
- The system is connected to electricity on a separate line with the mandatory installation of a protective device.
- The heating element and the thermostat are selected in such a way that the power of the first does not exceed the maximum power of the second one. If there is no possibility of observing this rule, the system must be divided into several parts and each of them must be equipped with a separate thermostat.
- The system can be equipped with a remote temperature sensor (measures the air temperature) and its built-in analog (determines the temperature of the heating system directly).
- Upon completion of installation, the system must be thoroughly tested. First, the heating operation is checked at minimum power, then it gradually rises. If everything is fine, you can proceed to pour the screed and lay the floor tiles. Any defects should be eliminated immediately, because to fix them after laying the tile will have to destroy the lining and the underlying leveling layer.
Set for work
Before embarking on a study of the technology of equipping an electric warm floor, prepare the devices necessary for the successful implementation of this activity. Some manufacturers complete their heating cables the right materials, in rare cases, even the necessary tools are present. We will consider the full list. Specifically in your case, it may vary slightly depending on the specifics of the situation, but the standard set for work includes the following items:
- heating cable;
- temperature regulator;
- temperature sensor;
- wires for connecting the system;
- heat-insulating substrate (it is best to use penofol);
- pliers;
- insulation tape;
- mounting scotch;
- trowel for laying tiles;
- tile adhesive;
- material for grouting joints;
- reinforcing mesh;
- material for pouring the leveling layer (finished self-leveling mixture or cement, sand and water).
First step. Align the base
First of all, we dismantle the old floor covering, if any. If you want, you can go to the trick: pour the old finish with a primer, for example, users respond well to the primer paint CERESITCT 15. Although its main purpose and not in this, as a fill for the old finish, it is also quite suitable. The method is checked on linoleum. In general, editing technology recommends completely getting rid of the old finish.
The rough floor is thoroughly cleaned from any kind of garbage.
Further, if the base is uneven, the step of pouring the screed follows. You can both purchase the ready self-leveling mixture, and prepare the composition yourself, taking for this 4 parts of sand, 1 part of cement and water. The optimum thickness of the screed is determined by yourself in accordance with the size of the existing surface swings. Your task is to get a perfectly horizontal base.
The priming is done in the standard way, i.e. by lighthouses. we give strength. If a ready-made formulation was used, the required time is specified in the instructions. In the case of a cement-sand mortar, it is recommended that it be allowed to stand for 28 days. In practice, so many do not wait almost never and continue to work after 4-7 days. The decision is yours.
The second step. We study the elements of the system and prepare for their installation
Important! The cable is forbidden to lay heavy furniture, equipment, sanitary ware and various massive interior items in the places of future accommodation. Because of this pressure, the elements of the system can overheat and break.
As a rule, the heating cable is additionally equipped with a corrugated pipe, through which the installation of the sensor of the warm floor will be carried out.
Directly the sensor in the factory configuration usually does not go. This product is sold together with a temperature controller, which also needs to be purchased.
Schemes and generally recommendations for the installation of both a warm floor cable and sensors with regulators are usually given by the manufacturers. Determine the mounting location of the sensor in accordance with the recommendations in the attached instructions. Make stitches in the floor and wall to lay the corrugated tube. At this stage, you need to remember that this channel should not have sharp bends - everything should be done as smoothly as possible, otherwise you can not enter the sensor correctly.
The corrugated tube is laid in the strobot. Finish the corrugation with an insulating tape and plant the structure on a tile adhesive or other suitable binder.
Put a wire in the socket to connect the system. Experts recommend using a three-wire copper wire section 2.5 mm2. One side of the cable goes to the thermostat, the second one must be connected to the device protective shutdown, performing a serial connection to the machine in the shield.
The third step. Necessary calculations and familiarity with the scheme
You must first perform a system calculation. Recommendations in this regard are given in the table.
Where the power is shown in the form of a range, select a specific value, taking into account the goals and tasks assigned to the heating system, i.e. whether it will be used for basic room heating or simply as a means of creating more comfortable conditions.
The calculation is extremely simple. First you determine the required heating area, which will be occupied by the cable, and then multiply it by the recommended power value. For example, you need to heat 4 m2 in the kitchen. The warm floor will be equipped as additional heating. Consider as follows: 4x90 = 360W. In accordance with the calculated value, you select the cable power.
Schemes connecting the cable and temperature controllers, as noted, manufacturers give in their instructions. It remains for you to follow these recommendations, therefore, these moments will not be considered separately.
The fourth step. Mount the floor
First of all, we lay on the base heat insulation material. For use in a complex with a warm floor, penofol with a self-adhesive layer and a foil-coated coating is perfectly suitable. We put the insulation foil up. Joints between stripes are glued with mounting tape.
Important! Penofol is laid with a 0.5-1-centimeter indentation from the walls in the corners of the room.
Above Penofol we lay the reinforcing mesh. It will exclude further deformations of the "layers" of the system after pouring the screed.
We proceed to laying the heating cable. For fixing, we use the mounting tape from the kit. If it does not provide a good grip with the base, we sit the warm floor cable on the "bugs" of the tile adhesive. The upper part of the "lapuhs" is removed with a spatula.
The simplest method for self-improvement is the method of laying the heating cable with a "snake". Between the elements we maintain a minimum of 8-centimeter step. To accurately determine the step, multiply the area of the room by 100 and divide the resulting value by the total length of the cable.
Packed cable
Important! The cable is laid with smooth bends, without excessive tension, internal stresses and any kind of kinks.
The cable is laid as carefully as possible, so as not to damage it and heat insulation. On the shtrobe we start the end of the heating element, which will be connected to the thermoregulator, into the jar, together with the corrugated pipe for the temperature sensor. Prior to this, food should be provided in the jar.
Preliminary experts recommend to place in the corrugated thermal sensor and connect it to the temperature regulator. Due to this reception, the controller will be able to disconnect the power of the heating cable in case of its overheating. The corrugation itself is fixed in the strobi by means of a tile glue.
We connect the cable and the regulator in accordance with the diagrams given in the manufacturers instructions.
Having tested the system in accordance with the recommendations given earlier, pour over a 5-centimeter cable over the cable, give it about 1 month for a set of strength, and only after that we proceed to finish the finish.
The diagram shows a cable filled with a solution on top of which tiles are laid
Fifth step. We lay the tile
For finishing it is enough to use a tile with a thickness of 7 mm - this is an optimal indicator in case of using tile in combination with a heating cable.
Directly laying the tiles are done in a standard way, with special glue. There is only one important point: the distance between the elements of decoration should be at least 2-3 mm.
After completing the finish, we give the glue about a week (in your case, the period may differ, specify this point in the instructions for the composition) for a set of strength, we rub the seams and take the warm floor into operation.
Successful work!